Have you always wanted to know how to use a WigJig to make jewelry? Vanessa Edmund demonstrates how to make a bracelet using this tool.
Braiding wire for jewelry creation isn’t much more complicated compared to braiding string, and it is possibly less difficult than braiding your hair. Creating jewelry from braided wire just means finding a creative way to cover the ends in order that the wire ends are properly terminated to look great and also to supply a loop allowing you to connect to your form.
Supplies needed:
- 60 inches of the 26 gauge wire, 66 inches of the 24 old wire or 72 inches of the 22 gauge wire.
- 12 inches of the 24 gauge wire.
- 1 filigree form for a single strand bracelet.
- 2 medium jump rings.
- Masking tape.
Tools Needed:
- Roundnose Pliers.
- Flush Cutter.
- Bent Chainnose Pliers.
- Any WigJig acrylic jig.
- 3 steel pegs.
- Half an hour of your time.
Jewelry creation skills required:
- Using a WigJig to create braided wire.
- Capability to cover fine gauge wire to correct the braided wire ends.
- Capability to close and open jump rings in order to connect a clasp to your bracelet.
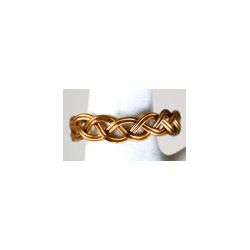
 Step #1: Cut and straighten up three 20 inch long portions of 26G wire or three 24 inches portions of 22G wire. The fragile bracelet displayed at right is made from 26G wire. If 22G wire were used the bracelet could be thicker. Definitely, the 24G will make a bracelet advanced in dimensions between those two.
Step #2: Create a “U” designed bend in the middle of every piece of wire.
Step #3: Place 3 steel pegs consecutively on the WigJig jewelry design jig. As displayed at right, position your 3 “U” designed bends on the pegs on the jig. Now place two steel pegs about 1-to-1 1/2 inches from the 1st three pegs. Position the wire around those two pegs as displayed at right.
Step #4: At this point, using masking tape or any non marking tape, tape the wire down amidst your 3 pegs and also the 2 pegs. Since we’ll be tugging towards these pegs as we create the braid, the pegs would want to pop out unless the wire is safely taped.

Step #5: Now we start to braid. The wire displayed at right is 22G instead of the 24G used in the bracelet in the earlier segment. Begin by relocating one of the exterior wires over the wire in the middle so the wire you simply relocated gets the middle wire. Then transfer the wire on the reverse side over the middle wire, so that it will become the middle wire. In the image displayed at right, the next thing is to relocate the red wire over the blue wire, as well as relocating the white wire over the red wire.
 Step #6: Keep on braiding right until the braided wire portion is approximately 6 1/2 inches long. Focus on trying to keep continuous tension on the wire as you braid. Additionally focus on trying to keep the 2 wire portions in each color with each other and similar. Do not let the 2 wires of the exact same color cross one another.
Step #7: When you’ve finished the braid, get rid of the wire from the jig. After taking out the wire from the jig, manually, align the 6 wires on each end so that they are directly and parallel to one another. You must have about 1 to 1 1/2 inches of straight wire on either end of a 6 1/2 inch portion of braided wire.
Step #8: Along with the braiding finished we have to complete the ends of the bracelet. First, keep the end of the braided portion together with your bent chain nose pliers and bend the 6 wires about 75 degrees. Then keep the wire close to the bend, but on the end portion with 6 straight wires together with your step jaw pliers or round nose pliers and create a “U” designed bend in the wire. Next step, using the flush cutters cut the extra wire off about 1/4 inch behind the “U” designed bend.
Step #9: Now we have to cover fine gauge wire across the braided wire to correct the design and warp the cut wire ends. Square wire or half round wire is fantastic for this, in case you do not have that, 22G or 24G round wire is fine. Wrap the wire securely. The wire displayed at right is 24G wire used to complete the loop. Complete both sides of the braided wire exactly the same way. The braided wire portion should definitely be regarding 6 1/2 inches long with a loop on either end.
Step #10: At this point we put the clasp on. Open a medium to large jump ring and use this jump ring in order to connect the clasp to the loop in one end of the braid that you just finished. Then close the jump ring. Repeat this procedure connecting the loop in the opposite end of the braided wire to the opposite side of the clasp.
Step #11: Carefully bend the braided wire right into a round design possibly using a bracelet mandrel or manually. This finishes your jewelry project.
It is suggested that you try this project first using low-cost wire. This is a task that could be performed by amateurs, but like anything you’re going to get much better at it with more experience.
This article was written by Vanessa Edmund and provided exclusively to the Cotton Ridge Create! Vanessa writes on a variety of topics related to jewelry design and offers lots of tips here for bracelet making. Images copyright 2013 Vanessa Edmund.