 |
 |
 |
 |
 |
 |
 |
 |
 |
 |
 |
 |
 |
 |
 |
 |
A beautiful winter wonderland from the the artisans on Etsy. Stay cozy and warm, and decorate for the season. Just click on an image above to view the item. Enjoy the Treasury!
Related Articles


| |
|
|
|
| |
|
|
|
| |
|
|
|
| |
|
|
|
A beautiful winter wonderland from the the artisans on Etsy. Stay cozy and warm, and decorate for the season. Just click on an image above to view the item. Enjoy the Treasury!
This fascinating article is by guest author Audrey Brooks, and sponsored by Emerson Creek Pottery. Emerson Creek Pottery is handcrafted in the Blue Ridge Mountains of Virginia.
Precise patterns used in pottery are an art form dating back thousands of years and encompassing many cultures, including Greek and Native American. The styles and patterns (like all art) were constantly changing to include a flux of outside influences and shifts in historical meaning.
The linear vase designs found in the pottery of Ancient Greece constitute most of a phase in Greek fine art at the end of the Greek Dark Ages (9th and 8th centuries, BC). The proportions for the vases were based on a meticulous system – with the vessel height being twice the width, and the neck measuring half of the height – while patterns were carefully selected to highlight vessel shape and distinct portions. To emphasize dimension and height, Greek patterns in the later eras were restricted to specific shapes – the neck and belly. These areas also offered the most freedom in decoration. Greek pottery, unlike today, was only finished in the kiln, or “fired”, once, but the process usually involved several steps.
 The Protogeometric style (c. 1050 – 900 BC) is characterized by wavy lines, circles, and triangles. A border with a distinct repeated motif, known as a meander, has been added in the Early Geometric Period (900 – 850 BC) and the vases are taller. The designs are more limited to the base of the neck down through the middle of the vessel. In the Middle Geometric Period (850-760 BC), the meander is now the focal point of the vessel, placed between the handles – the most important area of the vessel, known as the metope. Animals and humans are often depicted, a departure from the simplistic motifs of the earlier styles. It wasn’t until the end of the 6th century that the black- and red-figure pottery became more prolific.
The larger pieces were often assembled separately and the firing process involved 3 steps – each one a variance on oxidization – introducing air into the kiln and then reducing the supply of oxygen while burning green wood to achieve the blackened effect. Once fired, the attractive pottery was put to many utilitarian uses by the Ancient Greeks – mixing vessels, cups, jugs, cosmetics – as well as marking graves and holding tomb offerings.
The pottery of the Native Americans is one of the oldest art forms in the history of the Americas, leading back at least as far as 7500 years ago. While as artful as it was useful, their pottery technique centered more on form and function. It is as varied as its many cultures, and developed as ways to transport, cook, and store food. Ceramics were also used for pipes, funerary urns, censers, and many other art forms. Evidence of early Native American Pottery has been found all through South America and has been dated back from 4,500 to 6,000 years ago, the oldest currently having been found in the Southeastern United States.
The Native Americans never used a wheel to shape their distinctive and symbolic pottery – all of it was made by hand and wood fired in a pit. The most common way to form a vessel was by coiling and pinching – rolling the clay into long ropes and coiling them atop each other while blending them in for uniform thickness and strength. While the ornamentation of Native American pottery varied widely, many of the shapes were universally used, each having its own purpose, and translating from one style to another with the passage of time.
Bowl, 11th / 13th centuries. Pueblo Alto, Chaco Canyon, New Mexico, USA
Recognizing Native American Pottery Styles
Beginning in the 2nd millennium BC, stirrup spout vessels became common among the South American Indian culture. The ‘stirrup’ handle forms part of the spout, which rises from the top of the vessel. They were often elaborate, with animals sculpted into them. Although the exact date of introduction for the olla is unknown, this vessel was multi-purposed as pot for cooking food, or storing ashes from cremated bodies. While generally made with short wide necks and large ‘bellies’, when used for storing water, they were made with narrow necks to prevent evaporation, and some were even fashioned primarily for nursing infants.
Generally left unglazed, this allowed for water to permeate the clay walls and “sweat”, which evaporated and kept liquids cool. They were also buried next plants as irrigation. Before 500 BC, the double spout and bridge vessel became widely used by Peruvian Indians. It was a simple design, with two pour spouts “bridged” by a handle. It was usually decorated rather ornately, and burnished after firing.
To learn more about Ancient Greek or Native American/Mesoamerican pottery, visit The University of Reading and The Foundation for the Advancement of Mesoamerican Studies, Inc.
This article is by guest author Audrey Brooks, and sponsored by Emerson Creek Pottery. Emerson Creek Pottery creates dinnerware, bakeware, kitchenware and home decor that is safe and beautiful. Handcrafted ceramics from the Blue Ridge Mountains of Virginia.
Images from the public domain, from Wikipedia. Image sources: Greek Vase and New Mexico Bowl.

Disclosure: I am an affiliate of Craftsy and will receive a small commission if the links below are used to make a purchase. My recommendation is based on personal, positive experience with this company.
Learn new kitchen skills with Craftsy! Check out the new free mini-course, Complete Knife Skills with Brendan McDermott, and impress your family and friends.
Not interested in cooking? Learn something new in 2014 with one of Craftsy’s many FREE mini classes! Try your hand at quilting, sewing, make a pizza at home, or learn to take beautiful family portraits. Commit to learning a new skill in the new year. Look at what you can learn for free here: Craftsy Free Classes.
I have been very impressed with my experiences with Craftsy – if you are interested in reading more about Craftsy’s online classes and how they work, you may like my two articles: Online Class Review: Shoot It! Product Photography by Craftsy and Fab Felt Christmas & Holiday Crafts Online Course ~ A Review.
Disclosure: I am an affiliate of Craftsy and will receive a small commission if the links on this page are used to make a purchase. My recommendation is based on personal, positive experience with this company.
Disclosure: I am an affiliate of Craftsy and of Amazon.com, and will receive a small commission if the links on this page are used to make a purchase.
One of my regrets from my college experience is neglecting to take art classes. The College of William and Mary has an entire building devoted to the arts, yet I chose other electives instead. Perhaps I was a little intimidated. My dream now is to take art and craft classes when and where I can – even on the internet! A few years ago I had the opportunity to take wheel-thrown and handbuilding pottery lessons locally. When my daughter is old enough – and given the resources – I hope to travel and experience more art studios and schools. Fortunately, we have many available here in Huntsville, Alabama, and in the region.
Arrowmont School Ceramics
My plan is to make “Art Schools Around The World” a series on this blog, featuring various places where I’d love to study. Sometimes it will be a more realistic spot for me, such as Arrowmont or the Appalachian Center for Craft in Cookeville, TN. Other times an international school will be featured – a pipe dream for me, maybe, but who knows! And, perhaps I will help you discover one that is nearby of which you were unaware.
I am somewhat familiar with Arrowmont School of Arts and Crafts because of our annual family trips to the Gatlinburg, TN area. If you have not been, I would recommend it! You can read my posts about the Arts & Crafts Community Art Loop and other things to do. Although Gatlinburg, Sevierville
, and Pigeon Forge
can be a little “tourist-y,” there are lots of attractions for the nature-lover, arts and crafts enthusiasts, and kids.
The school has a shop in Gatlinburg near Ripley’s Aquarium that we’ve visited several times over the years. We are always so impressed with the creativity and skill of the teachers and students.
The Arrowmont School of Arts and Crafts offers weekend workshops, as well as one-week and two-week workshops. Taught by both university faculty and practicing studio artists, there are classes for the beginner to advanced artist. The campus of 14 acres in Gatlinburg, TN holds professionally equipped studios and student housing. Residents of the local community also have the opportunity to take weekly classes.
The school offers education in the many fields, including:
Other offerings include the year-long Artists-in-Residence Program, conferences and symposia, exhibitions and galleries open to the public, and an art supplies store. In addition, the school provides a full day of art teaching to the students of Sevier County Schools each year.
Arrowmont School Studio
Is there an art and craft school that you would like to see featured? Please contact me.
Text Copyright 2014 Kathryn Depew. Information source: Arrowmont School of Arts and Crafts web site. Images from flickr.com used under the Creative Commons license. Images credit: PunkToad: Ceramics and Studio.
Disclosure: I am an affiliate of Craftsy and of Amazon.com, and will receive a small commission if the links on this page are used to make a purchase.


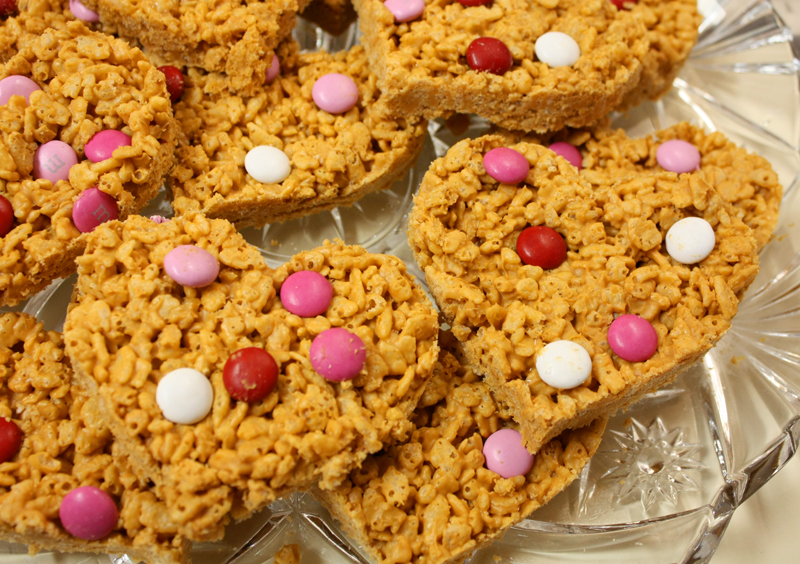 Every Valentines Day for the past few years, we celebrate the holiday with a party for the kids (and dinner out for us). Last year these Valentine Peanut Butter Butterscotch Rice Krispies Treats were a big hit! And the kids had a great time making their own tile coasters. Visit the Creative Kids area of this blog for more great activities for your kids!
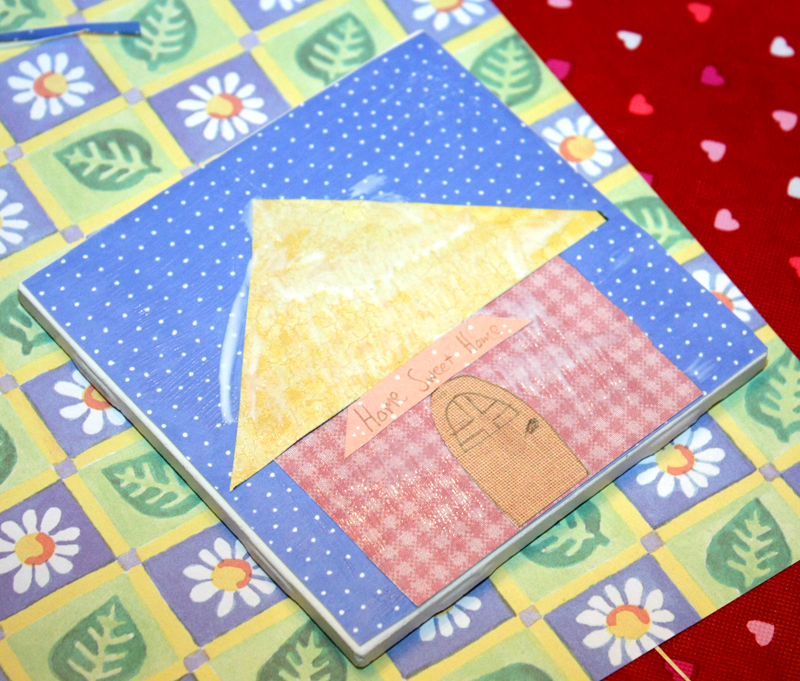
Below are some beautiful, creative Valentines Day gifts from the artists and crafters from Etsy. Just click on an image below to see the item. These are only a few of the many wonderful ideas you’ll find!
 |
 |
 |
 |
 |
 |
 |
 |
 - braggingbags") |
 |
 |
 |
 |
 |
 - ColourfulCorner") |
 |
Text and Images Copyright 2014 Kathryn Depew, except for Etsy images, which belong to the sellers.


Disclosure: I am an affiliate of Craftsy and will receive a small commission if the links below are used to make a purchase. My recommendation is based on personal, positive experience with this company.
Conquer your fear of color with the 2014 Craftsy Block Of The Month! This FREE mini class introduces you to color theory with new lessons introduced over 2014. Sign up today to create a beautiful and colorful sampler quilt!
Not interested in quilting? Learn something new in 2014 with one of Craftsy’s many FREE mini classes! Try your hand at sewing, make a pizza at home, or learn to take beautiful family portraits. Commit to learning a new skill in the new year. Look at what you can learn for free here: Craftsy Free Classes.
I have been very impressed with my experiences with Craftsy – if you are interested in reading more about Craftsy’s online classes and how they work, you may like my two articles: Online Class Review: Shoot It! Product Photography by Craftsy and Fab Felt Christmas & Holiday Crafts Online Course ~ A Review.
Disclosure: I am an affiliate of Craftsy and will receive a small commission if the links below are used to make a purchase. My recommendation is based on personal, positive experience with this company.

 Disclosure: I am an affiliate of Craftsy and will receive a small commission if the links below are used to make a purchase. My recommendation is based on personal, positive experience with this company.
Giving handmade gifts? Use the super cute gift tag below from Craftsy on your gifts this year and let your friends and family know their gift was handmade with love! Click on the image below for a downloadable tag. *Please note that you must register in order to print the Gift Tag below.

Don’t know what to get your friends and family? Looking for a unique gift idea? Give the Craftsy Gift Any Craftsy Class so your friends and family can choose the Craftsy class that fits them best. This is the gift they will use for years to come.
Disclosure: I am an affiliate of Craftsy and will receive a small commission if the links below are used to make a purchase. My recommendation is based on personal, positive experience with this company.

 |
 |
 |
 |
 |
 |
 |
 |
 |
 |
 |
 |
 |
 |
 |
 |
The artisans on Etsy offer a delightful selection of Christmas decorations and foods for your miniature home. This treasury highlights a few of the realistic dollhouse-scaled items available. You will find beautiful miniatures in all price ranges, to fit almost any budget.
You may also like to enter the Etsy Giveaways here on Cotton Ridge Create!
Merry Christmas, and enjoy the treasury!

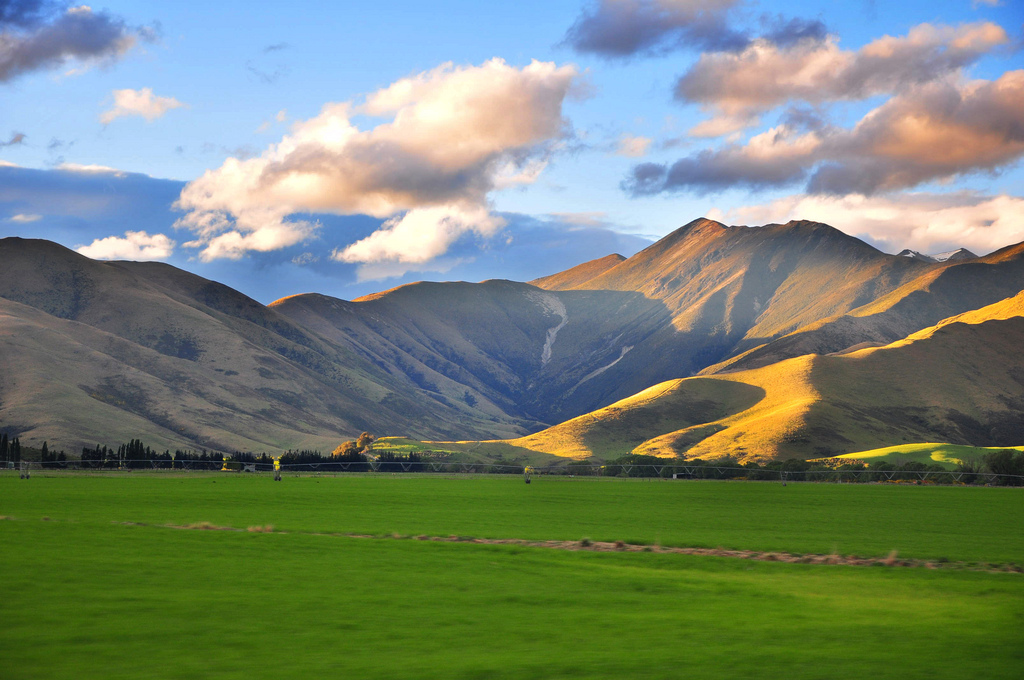
If any landscape photographer had their way, the weather and lighting would always be perfect; with today’s climatic fluctuations, that’s not going to happen. Shooting in extreme weather conditions like Arctic chills or Amazonian heat, one must know their equipment as well as their physical limitations. We carefully examine 5 useful tips for those braving the elements in anticipation of getting that irresistible sunset or violent snowstorm. From guest author Roger Kowalewski.
Adjusting lens sizes while standing amidst freezing cold winds, or heavy rainfall, could risk attraction of condensation or too much moisture. For those uncertain what that means, just imagine getting your iPhone waterlogged by accidentally dumping water atop it. The camera body has tons of moving, very important parts; our goal is not wasting an investment when changing lenses, so perhaps wait until you’re inside your tent or house before swapping.
Upon discovering the perfect landscape for your shoot, make your shot count. However, if the landscape is an inanimate object, perhaps consider driving closer to the object to gain another perspective. You will see the picture differently, perhaps desiring to capture more specific details instead of that faraway shot that really leaves your mind too much room to ponder. With different lenses and angles, photographers can accentuate landscapes more fluidly while easily amplifying their shots with close-ups.
Shooting downward at monstrous rock formations doesn’t really bring out much to the viewer. In order to clearly define what photo viewers should be looking at, perhaps toss some backpacks, pile people or even vehicles into your landscape before taking the shot. This provides some clarity to others looking on, and makes your backdrop stand out more. Adding another dimension to your picture scale is another great way to make various areas of the landscape stand out.

Specializing in nighttime shots means understanding all available light sources encompassing your shot. For example, many statues or large buildings you intend to capture have three, up to five, different light sources to consider: sky lights, any street lamps, interior lighting, reflections off water and, in some cases, moonlight. You must really know the shutter speed, flash capabilities and all surrounding elements before attempting to take pictures at night; read up!
Really doesn’t make sense to capture lamb in pig sties, nor should one snap horses running down the freeway. When capturing combination shots of landscape and animal, make sure they match. Cows in pastures, sheep on hillsides and so forth. Nothing demeans photos worse than out of place landscape shots; this is, of course, unless that was your intention for some whacky reason. This is not to say you won’t aspire to capture something unique.
Knowing your camera is definitely mandatory when snapping outdoor shots; understanding climatic changes can occur quickly should actually come higher in importance than your Canon. Learn lighting, proper cleaning of your camera lenses and where to shoot the best landscapes, and at what times, to really amplify the whole photography experience.
Guest author Roger Kowalewski is a freelance writer and photography buff from Indiana. You can follow him on Google+.
Images from flickr.com used under the Creative Commons License: Landscape by Benurs – Learning and learning…, Sea Landscape by pavel ahmed.


 Happy Valentine’s Day from Simply Be & Simply Yours!


